
Minnie Mouse cakes are a delightful treat for any Disney fan, especially for birthdays, parties, or celebrations. The charming design, vibrant colors, and iconic Minnie Mouse features make these cakes a showstopper. Whether you’re a baker or someone looking to create a memorable cake for your little one, here’s everything you need to know about making a Minnie Mouse cake that everyone will love.
Why Choose a Minnie Mouse Cake?
Minnie Mouse has been a beloved character for generations, symbolizing fun, joy, and childhood memories. A Minnie Mouse-themed cake is perfect for any celebration, from birthday parties to baby showers. Its recognizable design makes it a favorite among children and adults alike. Whether you opt for a classic design or a more modern twist, the Minnie Mouse cake offers versatility, allowing you to customize it according to your preferences.
Customizing Your Minnie Mouse Cake
When it comes to decorating your Minnie Mouse cake, you have a wide range of possibilities. From fondant figures to buttercream frosting, the customization options are endless. Some people prefer the classic Minnie Mouse face, while others may want to include her signature polka dots or bow. The choice is yours! Here are some popular elements to consider:
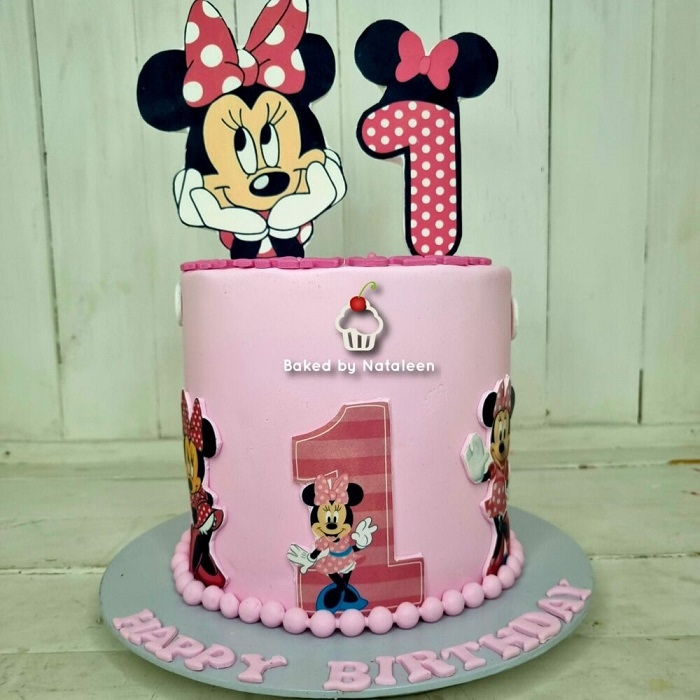
Minnie Mouse Bow
A large, pink bow is a signature feature of Minnie Mouse and can serve as the centerpiece of your cake design. You can either make the bow out of fondant or use pre-made decorations. The bow can be placed on top of the cake or even on the side for an extra touch of charm.
Minnie Mouse Ears
The iconic black ears are another feature you won’t want to miss. You can easily make Minnie Mouse ears using fondant or chocolate discs. These ears are typically placed on top of the cake, either standing upright or resting on the side.
Polka Dots
Minnie Mouse is often seen in her signature red and white polka-dotted dress, so incorporating polka dots into your cake’s design is a must. Whether you use edible polka dot stickers or piped buttercream, these spots will add a playful touch.
Key Ingredients for a Minnie Mouse Cake
To make a Minnie Mouse cake that not only looks good but also tastes delicious, you’ll need to start with high-quality ingredients. Here’s a list of basic ingredients you can use for your cake:
- Flour – All-purpose flour is perfect for the cake batter.
- Sugar – Granulated sugar adds sweetness to the cake and frosting.
- Eggs – Eggs bind the ingredients together and provide structure.
- Butter – For a rich and moist cake.
- Baking Powder – To help the cake rise.
- Milk – For moisture and to bring everything together.
- Vanilla Extract – Adds flavor to the cake and frosting.
For the frosting, you can use a variety of options:
- Buttercream Frosting – Light, fluffy, and easy to work with for piping and decorating.
- Fondant – Ideal for creating smooth surfaces and intricate designs.
- Cream Cheese Frosting – A tangy alternative to buttercream that complements cakes with a rich flavor.
If you’re making a Minnie Mouse cake for children, it’s important to choose flavors that appeal to their tastes. Vanilla, chocolate, or even red velvet are popular options that are sure to be a hit.
Step-by-Step Guide to Making a Minnie Mouse Cake
Preparing the Cake
- Make the Cake Batter: Start by preparing your chosen cake batter. Follow the recipe instructions, mixing the dry ingredients in one bowl and the wet ingredients in another. Once combined, pour the batter into your cake pans.
- Bake the Cake: Bake your cake according to the recipe, making sure to test for doneness by inserting a toothpick. Once baked, allow the cakes to cool before frosting.
- Level the Cake: Once your cake layers are cool, level them to ensure they stack evenly. This will give you a smooth, professional look for your Minnie Mouse cake.
Decorating the Cake
- Apply a Crumb Coat: Start by applying a thin layer of frosting over the entire cake to seal in any crumbs. This crumb coat will help create a smooth surface for your final frosting.
- Add the First Layer of Frosting: After the crumb coat has set, apply a generous layer of frosting over the cake. You can choose either buttercream or fondant depending on your preference.
- Create Minnie Mouse’s Ears: For the ears, use black fondant or chocolate discs. If you’re using fondant, cut two circles and attach them to the sides of the top layer of the cake. Alternatively, you can make edible discs using dark chocolate.
- Make the Bow: Use pink fondant to create a large bow. Roll out the fondant, shape it into a bow, and attach it to the top of the cake.
- Polka Dots: To add a fun touch, use white fondant or buttercream to create small polka dots all over the cake. You can use a piping bag for precision.
- Final Touches: Once your Minnie Mouse cake is assembled, add any extra details, such as Minnie’s signature facial features, a fondant Minnie Mouse figure, or even edible glitter for a sparkling effect.
Tips for a Perfect Minnie Mouse Cake
- Make It Ahead of Time: If you’re pressed for time, consider making the cake a day or two in advance. Just be sure to store it in an airtight container to keep it fresh.
- Use Gel Food Coloring: For a more vibrant color, opt for gel food coloring instead of liquid. Gel colors are more concentrated and will give you rich hues without altering the texture of your frosting.
- Practice Your Piping: If you’re new to piping, practice on parchment paper before decorating your cake. This will help you get the perfect consistency and design.
- Use Edible Glitter: For a touch of sparkle, consider using edible glitter or shimmer dust. It adds a magical element to your Minnie Mouse cake.
FAQ: Everything You Need to Know About Minnie Mouse Cakes
Can I make a Minnie Mouse cake without fondant?
Yes! You can use buttercream frosting to create the Minnie Mouse ears, bow, and polka dots if you prefer not to use fondant.
What flavors are best for a Minnie Mouse cake?
Vanilla, chocolate, and red velvet are all excellent choices for a Minnie Mouse cake. You can also mix flavors to make the cake even more exciting.
How do I make Minnie Mouse ears for the cake?
Minnie Mouse ears can be made using black fondant or chocolate discs. Simply shape the fondant into circles or melt chocolate into molds to create the ears.
How long does it take to decorate a Minnie Mouse cake?
Decorating a Minnie Mouse cake typically takes about 2-3 hours, depending on the complexity of the design.
Can I make a Minnie Mouse cake for a baby shower?
Yes! A Minnie Mouse cake is a great choice for a baby shower, especially for a girl. You can customize the colors to match the theme of the event.